How to bolt your motorcycle shed to the ground
How to bolt your Asgard motorcycle storage garage to the ground
All of our motorcyle sheds are strong, secure and very heavy. So many customers don’t bolt their unit to the ground. However, you may wish to have that little extra security by fixing your unit down to the ground using the supplied anchor bolts. So here is how to do it:
Bolting a motorcycle unit to the ground is very easy. All of our motorcycle sheds are supplied with an installation kit, including ground anchor bolts.
All of our motorcycle sheds have pre drilled fixing points in the corners (8mm diameter), ready for anchoring the unit to the ground.
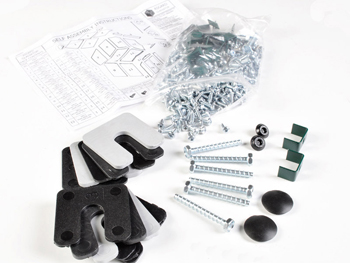
The Asgard installtion kit (contents varies for each product).
Bolting down your Asgard motorcycle storage shed
If you are in any doubt contact a qualified builder to carry out the work for you.
Note: If you choose the Asgard installation service, then our installation engineers will bolt the unit to the ground for you.
Tools you will need:
Power driver (electric drill).
6mm Masonry drill bit.
13mm Socket.
Brush or hoover (optional).
Before you begin: - Important points to note for fitting your Asgard shed to the Floor:
- The unit must be secured into a good solid concrete. At least 75mm deep
- Before fixing the unit, plan where it will go before bolting it down.
- Check for pipe work under the ground.
- We recommend the use of safety goggles when carrying out this work.
- You mays also want a brush and a hoover to clean as you go (optional).
1: Each Asgard shed has a pre drilled base sections, ready to bolt the unit to the ground.
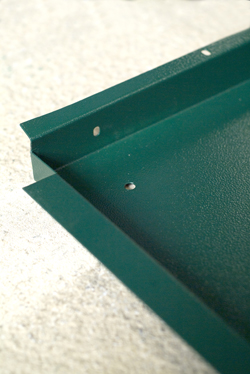
2: Drill through the pre drilled holes in your Motorbike shed to a depth of approx. 75-80mm You will need to clean debris from the hole as you drill.
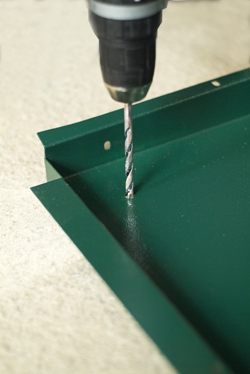
*You will need to clean debris from the hole as you drill. Take care not to drill the metal base of your shed or you will remove the protective coating. If you do damage the metal work, you MUST treat the hole with a rust inhibitor. Failure to treat the area will invalidate your warranty.
3: Thumb tighten the bolt into the hole.
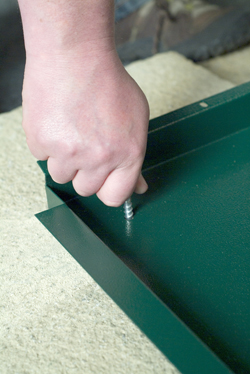
4: Using a 13mm socket tighten the bolt fully. Finish tightening with the 13mm socket until the bolt head is tight to the shed base.
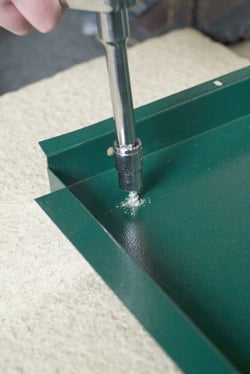
Repeat this simple process for each corner of each base section (front, mid and rear).
Note: You can carry out this procedure either before you build the shed or after the shed is built.


